This is a very introductory post in the Bluetooth technology. Its the first part so tune in for longer and more thorough articles.
Intro
In the Bluetooth world the Bluetooth technology has been evolved to support a sub-protocol of Bluetooth which is more energy aware. So we have Bluetooth classic which is used by your audio earrings or your car’s audio system, and then we have the Bluetooth Low Energy which is used mostly by power-constrained devices such us your smartwatch, your phone or your smart lock.
I will explain the very basics of the BLE and then I’ll move forward with a complete Bluetooth application.
The protocol
The Bluetooth Low Energy protocol is very simple. There are many network layers involved but you should not worry about any of them right now. We will write our apps using the application layer, as the BLE controller will handle the rest of the work for us.
In the Bluetooth ecosystem, there are two type of devices: centrals and peripherals.
The former are devices which connects to peripherals, think of them as clients – i.e your smartphone.
The latter are devices that accepts new connections. Think of them as servers – i.e your smartwatch.
The following figure summarizes the concept:
-
In BLE, there are some profiles defined by the Bluetooth SIG – the official organization taking care of the Bluetooth protocol.
-
Such profiles are HID profile, Heart Rate profile, Health thermometer profile, Proximity profile and many more.
-
Each profile defines which particular services must be served by the device. Each service may have zero, one or more characteristics – usually a service has between one to five characteristics.
-
The characteristics can be thought of as input/output endpoints of a service.
-
Each service or characteristic has a Unique Id, a UUID.
-
When a peripheral device wants to be found, its in advertising mode. In such mode advertisement packets are transmitted and received by nearby central devices scanning for peripherals. Such packets contains device-specific data such as the device’s name, Bluetooth Address or battery level. Such data are analyzed in later posts of the BLE series, so don’t forget to follow.
The implementation
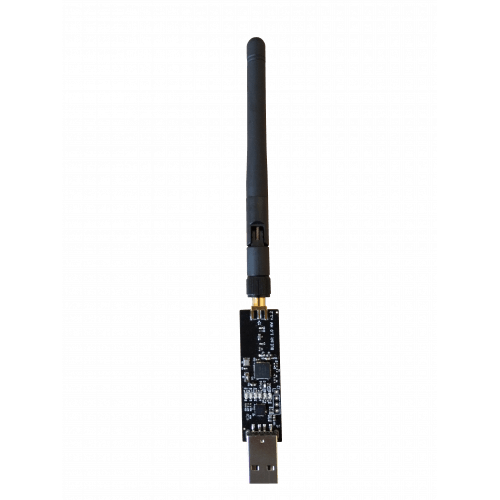
Controller used: Open-Source BLE:bit device – Official: blebit.io
Scenario: Setup a central device and a peripheral device. Both of the devices will be controlled by our software. The goal is to have two computers communicate over BLE.
In later articles I will show you how to communicate with a smartwatch.
Setting up the Peripheral
So we will firstly setup the peripheral device. It will offer some services to the clients and will be able to accept new connections.
Since we are using BLE:Bit we will use the BLE:Bit Java SDK. The BLE:Bit is one of the easiest tools to programmatically access and setup a Bluetooth connection. Also, it offers off-the-shelf tools which helps in BLE security auditing, recon, enumeration, debugging or any kind of BLE automation, really.
The following code creates some services, adds some characteristics and creates the controller object which when finished, it starts advertising to nearby devices.
public class VerySimplePeripheral {

    public static void main(String[] args)
    {
        setupPeripheral();
    }

    private static void setupPeripheral()
    {
        try {
            /** Retrieve a BLE:Bit Peripheral controller **/
            PEController pe = BLEHelper.getPeripheralController(new PEBLEDeviceCallbackHandler());

            /** Create a connection parameter **/
            pe.sendConnectionParameters(new PEConnectionParameters());

            /** We won't make use of any pairing method **/
            pe.configurePairing(ConnectionTypesCommon.PairingMethods.NO_IO);

            /** Set peripheral's Bluetooth Address **/
            pe.sendBluetoothDeviceAddress("aa:bb:cc:dd:ee:ff", ConnectionTypesCommon.BITAddressType.STATIC_PRIVATE);

            /** Create HRS service **/
            BLEService heart_rate_service = new BLEService(UUID.fromString("0000180D-0000-1000-8000-00805F9B34FB").toString());

            /** Create advertisement data **/
            AdvertisementData adv_data = new AdvertisementData();
            adv_data.setFlags(AdvertisementData.FLAG_LE_GENERAL_DISCOVERABLE_MODE | AdvertisementData.FLAG_ER_BDR_NOT_SUPPORTED);
            pe.sendAdvertisementData(adv_data);

            /** Add BLE Characteristic Heart Rate Measurement **/
            String uuid_char = UUID.fromString("00002A37-0000-1000-8000-00805F9B34FB").toString();
            BLECharacteristic hr_measurement = new BLECharacteristic(uuid_char, "hello-world".getBytes());
            hr_measurement.enableRead();    // Enable read-requests
            hr_measurement.enableWrite();   // Enable write-requests

            /** Bind Characteristic to the service **/
            heart_rate_service.addCharacteristic(hr_measurement);

            /** Attach service to the controller device **/
            pe.sendBLEService(heart_rate_service);

            /** Let the controller know that
             * we have finished with setting
             * up the device **/
            pe.finishSetup();

        }catch(IOException e) {
            System.err.println(e.getMessage());
        }
    }
}
Enter fullscreen mode Exit fullscreen mode
The above code shows how easy job it is to create a peripheral using the BLE:Bit SDK. Break-down of the above code:
- BLE:Bit Controller and the appropriate callback objects are created
- Connection and pairing/security parameters are set
- Address & Advertisement packet set
- BLE service and characteristics are defined
- Setup is finished – Device starts advertising to nearby devices
In the next article we will cover how a central device can be setup so peripheral can exchange data with the central device. No hardware knowledge is needed, as the BLE:Bit tool can be fully controlled by the software and is connected over USB.
In future articles, I will present how you may develop more advanced applications and also communicate with devices such as smartwatches and the like.
For more information about the Bluetooth controller: docs.blebit.io


暂无评论内容