As microservice architecture has become a standard for all the latest distributed systems, the tracing of the calls from one microservice to others has been a challenging thing for a while.
To solve this Sprig Cloud introduced Spring Sleuth which borrows heavily from dapper. Spring sleuth adds traceID and spanID to the logs so it makes easy to trace a microservice/ web service call.
In this tutorial, we will implement Spring Sleuth and integrate with Zipkin which is a distributed tracing system that provides a UI that lets us search the transactions using traceID and also view the dependency diagram which shows how many traced transactions went through each microservice.
Let’s create three spring boot microservice namely ServiceOne ServiceTwo ServiceThree.
In each of the services add the dependencies for Spring Sleuth, Zipkin, and spring boot stater web, the resultant pom.xml file should like below.
If you are a video person here is the video tutorial
Please show some love and subscribe to my channel Subscribe.
<?xml version="1.0" encoding="UTF-8"?>
<project xmlns="http://maven.apache.org/POM/4.0.0" xmlns:xsi="http://www.w3.org/2001/XMLSchema-instance"
    xsi:schemaLocation="http://maven.apache.org/POM/4.0.0 https://maven.apache.org/xsd/maven-4.0.0.xsd">
    <modelVersion>4.0.0</modelVersion>
    <parent>
        <groupId>org.springframework.boot</groupId>
        <artifactId>spring-boot-starter-parent</artifactId>
        <version>2.2.5.RELEASE</version>
        <relativePath/> <!-- lookup parent from repository -->
    </parent>
    <groupId>com.example</groupId>
    <artifactId>MainService</artifactId>
    <version>0.0.1-SNAPSHOT</version>
    <name>Service One</name>
    <description>Spring Boot With Spring Sleuth</description>

    <properties>
        <java.version>1.8</java.version>
        <spring-cloud.version>Hoxton.SR3</spring-cloud.version>
    </properties>

    <dependencies>
    <dependency>
            <groupId>org.springframework.boot</groupId>
            <artifactId>spring-boot-starter-web</artifactId>
        </dependency>
        <dependency>
            <groupId>org.springframework.boot</groupId>
            <artifactId>spring-boot-starter-web-services</artifactId>
        </dependency>
        <dependency>
            <groupId>org.springframework.cloud</groupId>
            <artifactId>spring-cloud-starter-sleuth</artifactId>
        </dependency>
        <dependency>
            <groupId>org.springframework.cloud</groupId>
            <artifactId>spring-cloud-starter-zipkin</artifactId>
        </dependency>

        <dependency>
            <groupId>org.springframework.boot</groupId>
            <artifactId>spring-boot-starter-test</artifactId>
            <scope>test</scope>
            <exclusions>
                <exclusion>
                    <groupId>org.junit.vintage</groupId>
                    <artifactId>junit-vintage-engine</artifactId>
                </exclusion>
            </exclusions>
        </dependency>
    </dependencies>

    <dependencyManagement>
        <dependencies>
            <dependency>
                <groupId>org.springframework.cloud</groupId>
                <artifactId>spring-cloud-dependencies</artifactId>
                <version>${spring-cloud.version}</version>
                <type>pom</type>
                <scope>import</scope>
            </dependency>
        </dependencies>
    </dependencyManagement>

    <build>
        <plugins>
            <plugin>
                <groupId>org.springframework.boot</groupId>
                <artifactId>spring-boot-maven-plugin</artifactId>
            </plugin>
        </plugins>
    </build>

</project>
Add a RestController for three services each having GET endpoints /serviceOne /serviceTwo /serviceThree as shown below.
package com.springsleuth.demo.controller;

import org.slf4j.Logger;
import org.slf4j.LoggerFactory;
import org.springframework.beans.factory.annotation.Autowired;
import org.springframework.context.annotation.Bean;
import org.springframework.http.HttpStatus;
import org.springframework.http.ResponseEntity;
import org.springframework.web.bind.annotation.GetMapping;
import org.springframework.web.bind.annotation.ResponseStatus;
import org.springframework.web.bind.annotation.RestController;
import org.springframework.web.client.RestTemplate;

@RestController
public class ServiceOneController {

    private static final Logger LOGGER = LoggerFactory.getLogger(ServiceOneController.class);

    @Autowired
    private RestTemplate restTemplate;

    @Bean
    public RestTemplate getRestTemplate() {
        return new RestTemplate();
    }

    @GetMapping("/serviceOne")
    @ResponseStatus(HttpStatus.OK)
    public ResponseEntity<String> getSleuthTest(){
        LOGGER.info("I'm here in service calling service two");
        String response = restTemplate.getForObject("http://localhost:8081/serviceTwo", String.class);
        return new ResponseEntity<String>(response, HttpStatus.OK);

    }

}
Spring Sleuth has the capability to integrate the same traceId to the microservice chain if the services are called using RestTemplate and have been Autowired, create the restTemplate object like the one in the above example and auto-wire so that spring handles the dependency injection.
We have the endpoint for serviceOne is ready, and create the endpoints for serviceTwo and serviceThree similar to the above serviceOne example below is the code for serviceTwo and serviceThree controllers.
package com.springsleuth.demo.controller;

import org.slf4j.Logger;
import org.slf4j.LoggerFactory;
import org.springframework.beans.factory.annotation.Autowired;
import org.springframework.context.annotation.Bean;
import org.springframework.http.HttpStatus;
import org.springframework.http.ResponseEntity;
import org.springframework.web.bind.annotation.GetMapping;
import org.springframework.web.bind.annotation.ResponseStatus;
import org.springframework.web.bind.annotation.RestController;
import org.springframework.web.client.RestTemplate;

@RestController
public class ServiceTwoController {

    private static final Logger LOGGER = LoggerFactory.getLogger(ServiceTwoController.class);

    @Autowired
    private RestTemplate restTemplate;


    @Bean
    public RestTemplate getRestTemplate() {
        return new RestTemplate();
    }


    @GetMapping("/serviceTwo")
    @ResponseStatus(HttpStatus.OK)
    public ResponseEntity<String> getServiceTwo() throws Exception {
        LOGGER.info("Here inside service two ");
        String response =  restTemplate.getForObject("http://localhost:8080/serviceThree", String.class);
        return new ResponseEntity<String>(response, HttpStatus.OK);
    }

}
package com.springsleuth.demo.controller;

import org.slf4j.Logger;
import org.slf4j.LoggerFactory;
import org.springframework.beans.factory.annotation.Autowired;
import org.springframework.context.annotation.Bean;
import org.springframework.http.HttpStatus;
import org.springframework.http.ResponseEntity;
import org.springframework.web.bind.annotation.GetMapping;
import org.springframework.web.bind.annotation.ResponseStatus;
import org.springframework.web.bind.annotation.RestController;
import org.springframework.web.client.RestTemplate;

@RestController
public class ServiceThreeController {

    private static final Logger LOGGER = LoggerFactory.getLogger(ServiceThreeController.class);

    @Autowired
    private RestTemplate restTemplate;


    @Bean
    public RestTemplate getRestTemplate() {
        return new RestTemplate();
    }


    @GetMapping("/serviceThree")
    @ResponseStatus(HttpStatus.OK)

    public ResponseEntity<String> getServiceThree() throws Exception {
        LOGGER.info("Here inside service Three ");
        return new ResponseEntity<String>("Success calling Spring Sleuth", HttpStatus.OK);
    }

}
Application Properties
Since we will be running all the three microservices on the same machine we will have them run on different ports, set the ports in the application.properties file of the respective projects. The appliction.properties file will have two attributes service.name and server.port like below.
spring.application.name=serviceOne
server.port=8080
Zipkin Setup
Zipkin is an open-source project that you can download using the below command, more about Zipkin can be found at Zipkin.io.
curl -sSL https://zipkin.io/quickstart.sh | bash -s
Once downloaded run Zipkin jar using the following command.
java -jar zipkin.jar
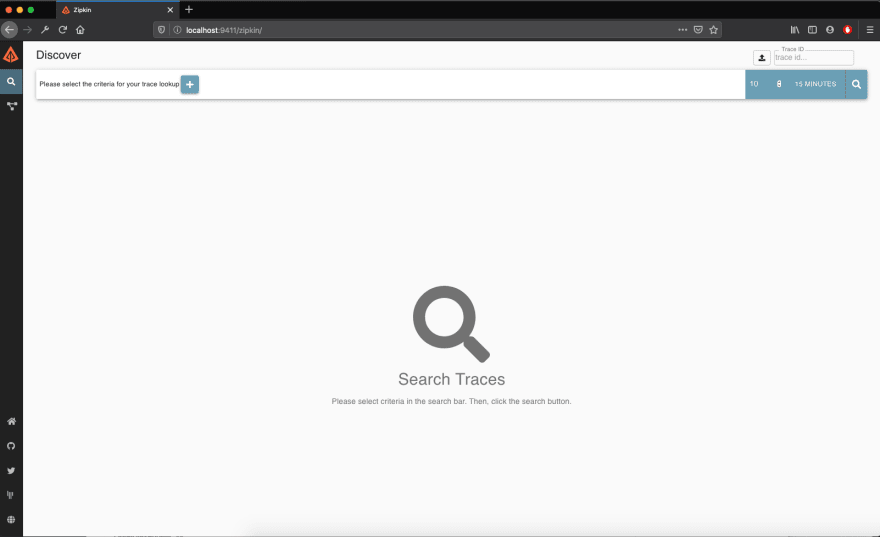
Zipkin UI can be seen at localhost:9094/zipkin, which looks like below.
Now let’s start all the three microservices on different ports, and hit the serviceOne endpoint. Use the log below with [serviceName, traceId, spanId, True/False] these are added by spring sleuth and we have nothing to do.
2020-03-14 23:31:05.084  INFO [serviceOne,2ed9f774e90e9450,2ed9f774e90e9450,true] 17903 --- [nio-8082-exec-2] c.s.d.controller.MainServiceController   : I'm here in main service calling service one

2020-03-14 23:31:05.181  INFO [serviceTwo,2ed9f774e90e9450,4bc477a78961a834,true] 17902 --- [nio-8081-exec-1] c.s.d.controller.ServiceTwoController    : Here inside service Two

2020-03-14 23:31:05.304  INFO [serviceThree,2ed9f774e90e9450,dbc9d06429c2394a,true] 17901 --- [nio-8080-exec-1] c.s.d.controller.ServiceOneController    : Here inside service Three
If you observe the above logs all the logs for three microservices has the same traceID for the call, now go back to zipkin UI and search with the traceID and you we the calls going from one service to other like below, it also shows the time taken for each call.
If you are a video person here is the video tutorial


暂无评论内容