This is the second post about a project of mine to recreate an Espen Kluge portrait series using processing with Java. Part 1 can be found here.
So far, we’ve been able to randomly scatter points on the figure using the loadPixels() and random() functions offered by processing. The next step would be to connect these random points across the figure to give the intersecting line effect in the actual artwork.
Now we have to loop through all the points on the figure that we’ve established and connect this to all the others. There might be a faster way to hit all the points than an O(n^2) runtime, but runtime isn’t super important for my purposes here. Hence, we’ll have one for loop that cycles through our array of points and another loop that creates a line between all the previous points before it in the arraylist (this avoids double counting). That means we’ll be making 1 + 2 + 3 + … + n lines, which is nicely summed as n*(n+1)/2. This means O(n^2).
My code looks like this:
PImage portrait;

ArrayList<Point> points = new ArrayList();
float threshold = .2;

void setup() {
  size(580, 625);
  portrait = loadImage("portrait_technique_0014.png");
  loadPixels();
  portrait.loadPixels();
  for (int i = 0; i < width; i++) {
    for (int j = 0; j < height; j++) {
      Integer loc = i + j*width;
      float r = red(portrait.pixels[loc]);
      float g = green(portrait.pixels[loc]);
      float b = blue(portrait.pixels[loc]);
      if (r > 250 & g > 250 & b > 250) {
      } else {
        float val = random(0, 100);
        if (val < threshold) {
          points.add(new Point(i,j,r,g,b));
        }
      }
      pixels[loc] = color(250, 250, 250);
    }
  }
  updatePixels();

  for (int i = 0; i < points.size(); i++) {
    for (int z = 0; z < i; z++) {
        color c = points.get(i).getColor();
        stroke(c);
        strokeWeight(.5);
        line(points.get(i).getX(), points.get(i).getY(), points.get(z).getX(), points.get(z).getY());
    }
  }
}
Because there’s no continuous drawing in the original artwork, there’s no need to use the draw function. And here’s the result:
This is a good start but the points are overlapping too much, obscuring the figure. I thought the solution to this would be setting a distance threshold for lines connecting points. Processing has a nice dist() function we can take advantage of:
for (int i = 0; i < points.size(); i++) {
    for (int z = 0; z < i; z++) {
      if (dist(points.get(i).getX(), points.get(i).getY(), points.get(z).getX(), points.get(z).getY()) < 90) {
        color c = points.get(i).getColor();
        stroke(c);
        strokeWeight(.5);
        line(points.get(i).getX(), points.get(i).getY(), points.get(z).getX(), points.get(z).getY());
      }
    }
  }
Now we’ll have it such that points too far away from one another won’t have a line drawn between them.
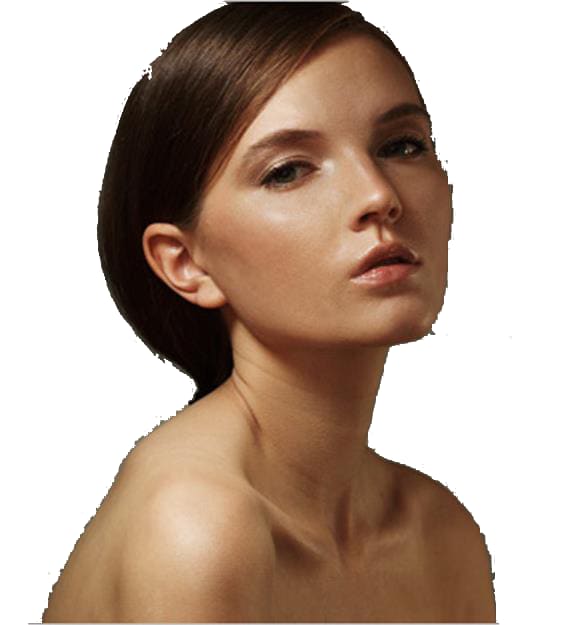
This looks significantly better and more like Kluge’s artwork and more like the actual reference picture:
Surprisingly, there was no need to string lines to the contours. We have a nice sense of the figure’s contours just by generating the random points on the figure. What is left out is Kluge’s interesting use of color to clue the viewer into the landmarks of the face (like bright red for lips or a nice green to mark the eyes).
Right now I’m just setting the line stroke color to one of the point colors. Since the points are being red in the order of insertion, we can control whether the line color is the point controlled by the first for loop or the second. Interestingly, we’ll get different results by altering which color we take:
for (int i = 0; i < points.size(); i++) {
    for (int z = 0; z < i; z++) {
      if (dist(points.get(i).getX(), points.get(i).getY(), points.get(z).getX(), points.get(z).getY()) < 90) {
        color a = points.get(z).getColor();
        color b = points.get(i).getColor();
        stroke(b);
        strokeWeight(.85);
        line(points.get(i).getX(), points.get(i).getY(), points.get(z).getX(), points.get(z).getY());
      }
    }
  }
This gives
This uses the color of the point in the outer for loop, whereas below uses the inner for loop point as the color.
for (int i = 0; i < points.size(); i++) {
    for (int z = 0; z < i; z++) {
      if (dist(points.get(i).getX(), points.get(i).getY(), points.get(z).getX(), points.get(z).getY()) < 90) {
        color a = points.get(z).getColor();
        color b = points.get(i).getColor();
        stroke(a);
        strokeWeight(.85);
        line(points.get(i).getX(), points.get(i).getY(), points.get(z).getX(), points.get(z).getY());
      }
    }
  }
You can see there’s more detail in this one. I’m not exactly sure why this is but it’s a very cool example of why generative art is so playful. Small tweaks can lead to very different results.
I think the foundation of what Kluge’s work is here as the colors in “Alternatives” seem to be due to his reference images and not the code itself. My imitation of his work is different because the range of color is only limited to browns and flesh tones rather than high saturated greens and reds.
For example, I did some editing on the original picture we used as a reference. Making the eyes have a green opacity and the lips more red:
And the processing sketch makes this out of it:
But have at it. The most fun thing to do is just to start playing with what processing can give you. Tweak the threshold point value to get tons more random points on the figure or make the distance threshold higher or lower. All these values are variable and give different results every time that you run the code.
I hope you’ve enjoyed tagging along. I love this kind of stuff and our imitation came together really quickly once the foundations of part one were laid down.
Here’s the github repo if you wanna clone it down too.


暂无评论内容