There are many ways to upload images and files. Also, there are many places from which to uploads files: Dropbox, local storage on the device, Google Drive and other services. In this tutorial, we are going to take a look at how to upload and create a file in Google Drive. To do so we need to Google Drive SDK and Google Authentication Base on Google Drive Rest API we are going to do that.
Okay, it’s enough to talk about it Let’s get into it,
Getting Started
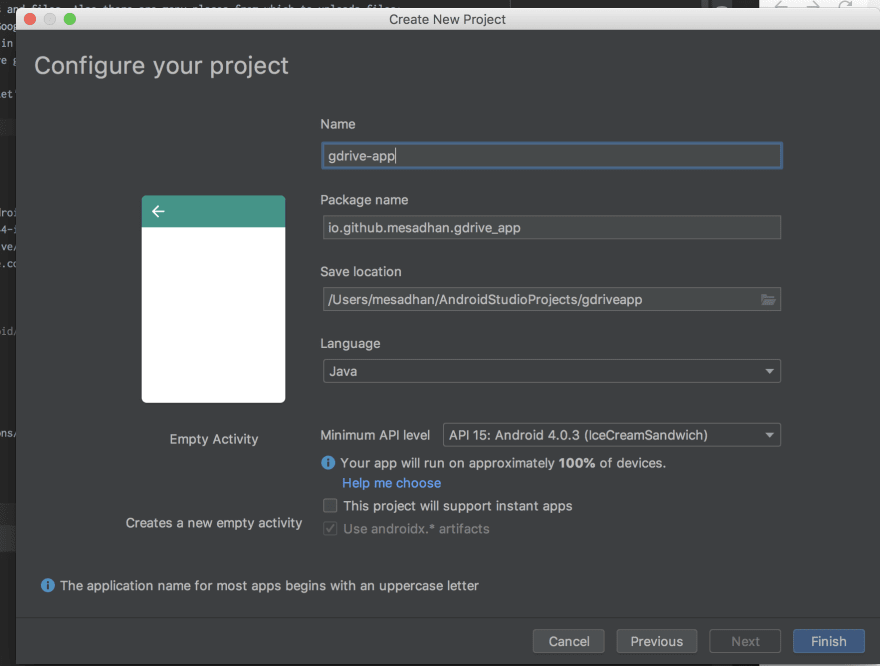
Start a new Android Studio project from the startup screen or New Project then select Empty Activity' from theChoose Project` box.
Enter the name drive-rest-app company domain and a project location. Make sure to Choose Language Java.
And Click Finish .
Registering for Google Drive
As we discuss we need to Google Drive SDK, So in order to use it, we need to enable that API. Okay don’t worry we will move forward step by step
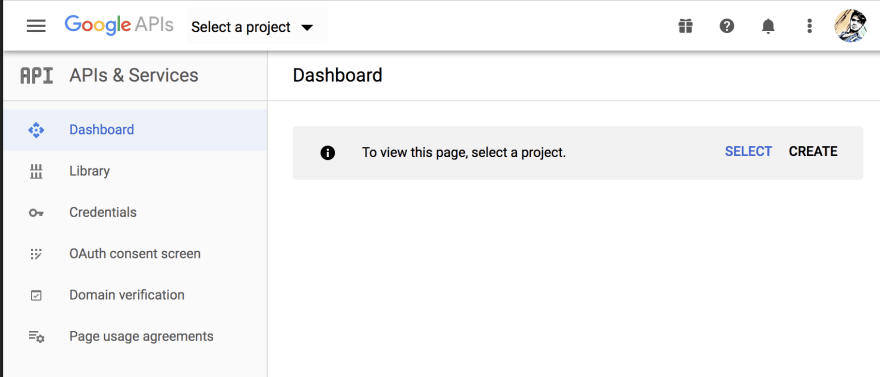
- Go to Google Console.
- Sign up for a developer account if We don’t have or then sign in.
-
Createa project OrSelectand click continue from below,
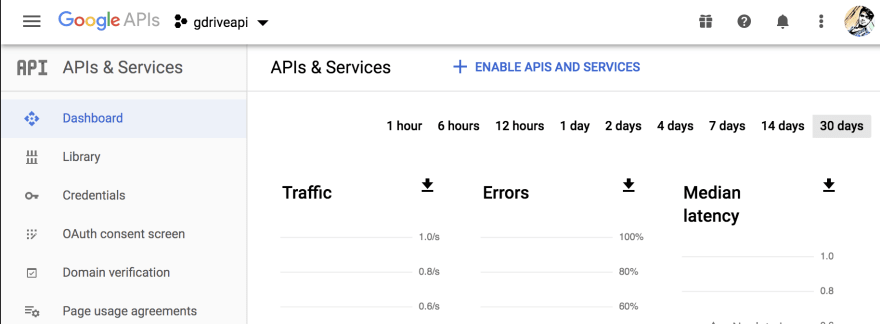
- After creating a project we have
Dashboardlike below,
- Now, Select
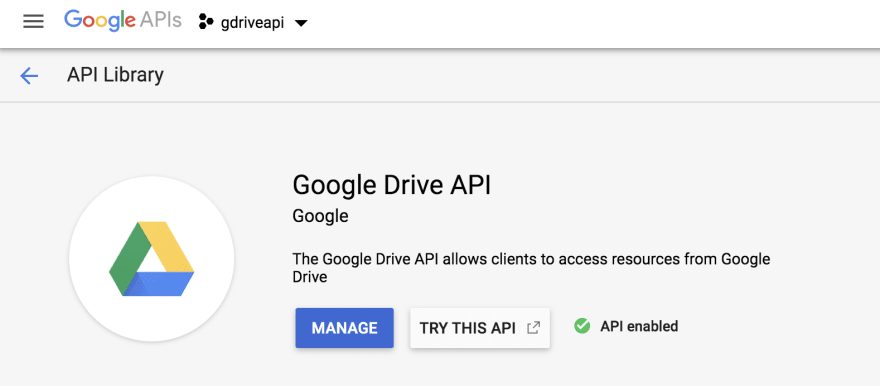
Libraryon the left-hand side to go to the Search screen - Type “Google Drive” and select Google Drive API.
- Select Enable. Then It looks like below,
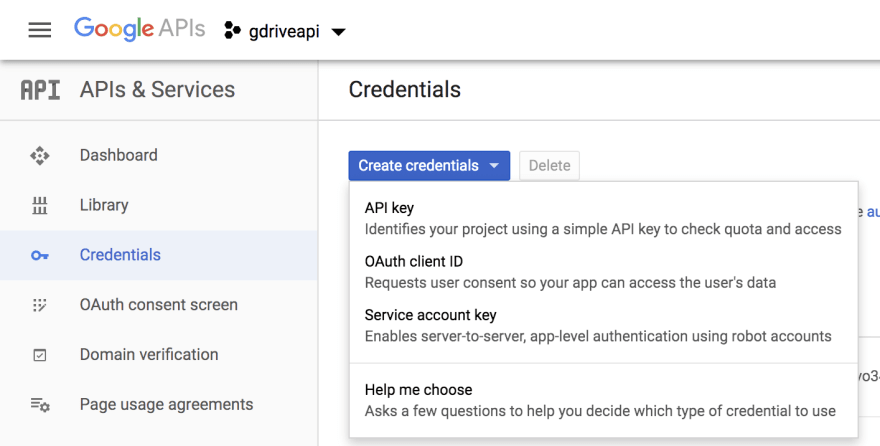
- Back to Dashboard, from Dashboard left-hand side go to Credentials. Create
Credentialby selecting theOAuth client IDlike below
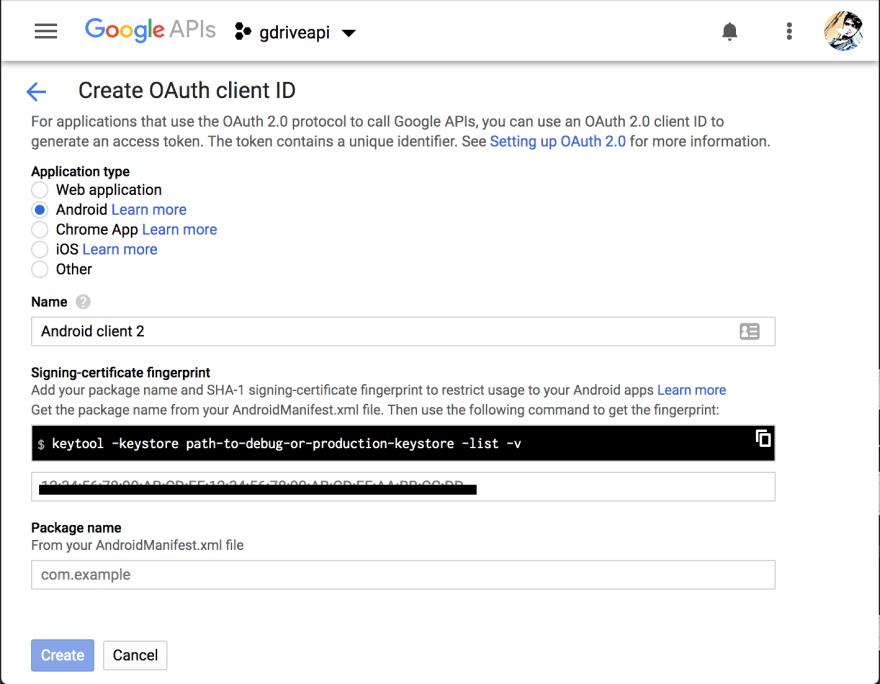
Tt navigates to the Create OAuth client ID page. Select our Application Type Android.
- Now we need your
SHA-1Signing-certificate fingerprintkey. Do so follow below steps - Copy the keytool text (press the Copy icon) and paste it into a terminal.
- Change the path-to-debug-or-production-keystore to your default debug keystore location:
- On Mac or Linux,
~/.android/debug.keystore. - On Windows,
%USERPROFILE%/.android/debug.keystore. - After you execute the command, you will be prompted to enter the keystore password. The password for the debug keystore is blank by default, so you can just press Return or Enter.
Notes: If throwing error to generate singing key then it might be
keystorenot found.
I used an alternative command for my machine MAC OS.
bash
 keytool -list -v -keystore ~/.android/debug.keystore -alias androiddebugkey -storepass android -keypass android
If everything works correctly, you should see something like this:
- Copy the
SHA1value from the terminal into the text field and press Create. The Client ID dialog will appear. Press OK.
- Finally, enter a name and the
package namethat we used tocreate our app. Although the hint refers to the package name inAndroidManifest.xml, it has to match theapplicationIdinbuild.gradleinstead — otherwise, the login flow will fail. - We don’t need to complete the form that appears, it’s optional so press
Saveand move on.
Optional, Now, In the Credentials page. Authorization on Android uses the
SHA1fingerprint andpackage nametoidentify your app, so youdon’t have to downloadanyJSON file or copy any API keyor secret to our project.
It about lots man, Don’t worry! Now, we are in the fun part .
Let’s Back to the coding part,
Sorry!
Dev.tocan’t render source files properly, the rest of the part will cover below.




暂无评论内容