Free TLS/SSL certificates for Azure App Service
Last month, it was announced at MS Ignite that users of Azure App Service would have free, managed TLS/SSL certificates:
Julien Dubois @juliendubois
Free SSL certificates on Azure App Services! It’s one of my most-awaited announcement at MS Ignite!!
azure.microsoft.com/en-us/updates/… 07:35 AM – 05 Nov 2019
![图片[3]-Configuring the free TLS/SSL certificates on Azure App Service - 拾光赋-拾光赋](https://www.blogs.ink/wp-content/themes/zibll/img/thumbnail-lg.svg)
8
24
Azure App Service is a very popular Platform-as-a-Service, which supports Docker images as well as many different languages and frameworks. For example, if you are using Java and Spring Boot, I believe it’s the easiest way to go to production on Azure. And using TLS/SSL is of course mandatory when going to production!
Configuring those certificates isn’t totally obvious, as you probably don’t use Azure to manage your DNS: this short guide is here to help you!
Configure your DNS records
Configuring your DNS records is probably the trickiest part, as it will depend on your DNS provider.
Here we will setup a very generic configuration, which should work on most DNS providers. But as a concrete example, we are going to use Gandi, which is a French DNS provider, and which is the one I use for my julien-dubois.com personal website as well as the different JHipster websites.
What you need to do is add a “CNAME” record that will point from your production DNS name to your Azure App Service instance.
For example, here:
- My production website will be
https://petclinic.julien-dubois.com. - My App Service instance is called
jdubois-petclinic, so it is hosted by default onhttps://jdubois-petclinic.azurewebsites.net.
WARNING: a hostname entry usually ends with a dot (.) unless you specifically want it to be suffixed by the current domain. This is what most DNS provider will require, and this is why in the screenshot we have jdubois-petclinic.azurewebsites.net. (notice the . at the end).
Your DNS provider probably also allow you to configure directly those DNS records, without using a Web control panel. In that case, your DNS entry would look like this:
petclinic 1800 IN CNAME jdubois-petclinic.azurewebsites.net.
Once this configuration is saved, remember that DNS records can take up to 48 hours to propagate, but it is usually much faster.
In order to check the propagation of your record, you can use a tool like https://dnschecker.org/. In our example, you can see on https://dnschecker.org/#CNAME/petclinic.julien-dubois.com that our CNAME record was correctly propagated.
Configure your Azure App Service instance
You can now go to the Azure portal, and select your Azure App Service instance.
“Custom domains” configuration
In the “Custom domains” menu on the left:
- Check the “HTTPS Only” box, as there is no need to keep an unsecured HTTP option.
- Click on “Add custom domain”, and add the domain name you have configured with your DNS provider
The “Validate” button here will check if your DNS record is correct: if you misconfigured your record, or if your record hasn’t been propagated yet, this is where you get an error.
“TLS/SSL settings” configuration
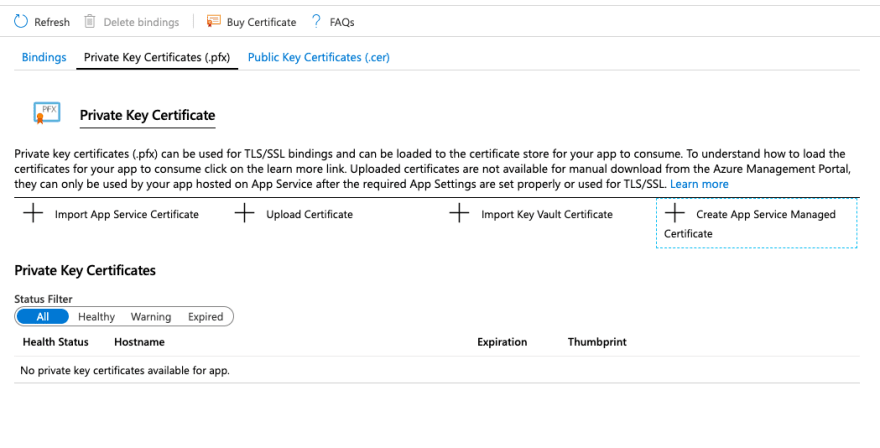
In the “TLS/SSL settings” menu on the left, go to the “Private Key Certificates (.pfx)” tab.
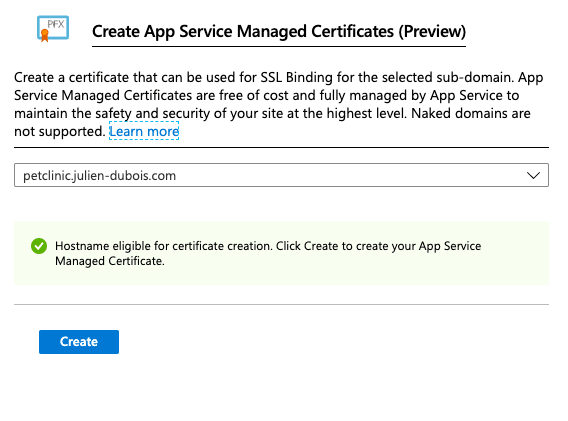
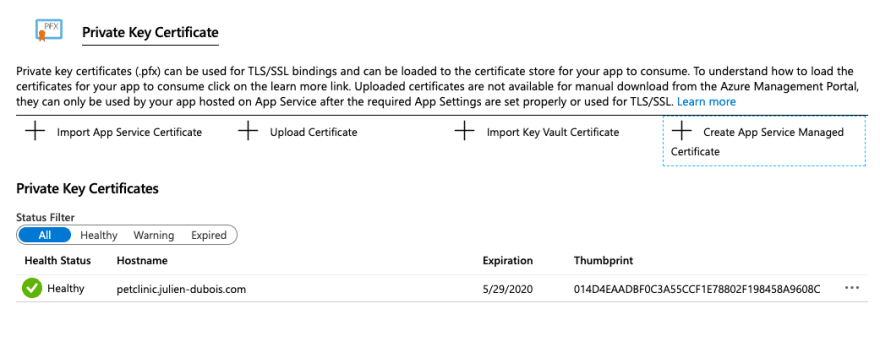
Click on “Create App Service Managed Certificate”, this will show a specific screen where you can select the domain name you have previously configured:
Click on “Create” and wait a few seconds for your certificate to be created:
Now, still in the “TLS/SSL settings” page, click on the “Bindings” tab:
Click on “Add TLS/SSL Binding”, and select the previously generated certificate. You should use “SNI SSL” as it will work on all modern browsers:
Click on “Add Binding”, and you’re all set up!
You can now enjoy your website using TLS/SSL:
原文链接:Configuring the free TLS/SSL certificates on Azure App Service


![图片[1]-Configuring the free TLS/SSL certificates on Azure App Service - 拾光赋-拾光赋](https://res.cloudinary.com/practicaldev/image/fetch/s--4VSoC0PP--/c_limit%2Cf_auto%2Cfl_progressive%2Cq_auto%2Cw_880/https://pbs.twimg.com/profile_images/729555955030044673/jBxOqmsB_normal.jpg) Julien Dubois @juliendubois
Julien Dubois @juliendubois![图片[2]-Configuring the free TLS/SSL certificates on Azure App Service - 拾光赋-拾光赋](https://res.cloudinary.com/practicaldev/image/fetch/s--P4t6ys1m--/c_limit%2Cf_auto%2Cfl_progressive%2Cq_auto%2Cw_880/https://practicaldev-herokuapp-com.freetls.fastly.net/assets/twitter-f95605061196010f91e64806688390eb1a4dbc9e913682e043eb8b1e06ca484f.svg) Free SSL certificates on Azure App Services! It’s one of my most-awaited announcement at MS Ignite!!
Free SSL certificates on Azure App Services! It’s one of my most-awaited announcement at MS Ignite!!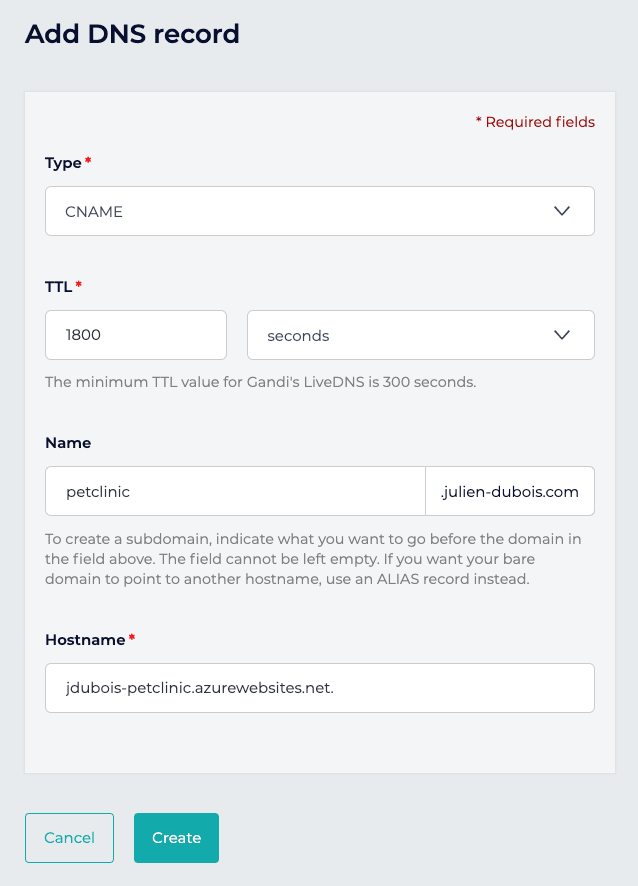



暂无评论内容